
“We work on a product that knows the sea.
All the senses have been awakened.
We’ve touched it.
We heard it.
We looked at it.”
Waiting at the bus stop late one night after being out dancing tango, my friend showed me a short documentary. The poetry came from a group of muscular, tattooed, no-nonsense Frenchmen wearing hair nets, marveling at the butter they were making.
A couple of days later, I received a special gift from another friend. Fragrant with cumin, freckled with flakes of sea salt hitting the tongue. The kind of homemade crispbread that deserves better. Better butter, that is.
It doesn’t take much to unleash an obsession. And thus, the quest for perfect homemade butter started with two innocent events the same week.
As this post is over 3,000 words long, you can click here to skip straight to the instructions for making your own butter, or browse using this outline:
- How hard could it be?
- What’s so Swedish about butter, anyway?
- It all starts with the cream
- The color of the cream
- Culturing the butter
- Churning the cream
- To wash, or not to wash?
- Working the butter
- Salting the butter
- Presenting your glorious result
- How to make flavorful cultured butter at home
- Troubleshooting
- The quest continues
How hard could it be?
Pour cream into a
But, making smooth, flavorful butter (or smör, as the Swedes say) at home turned out to be a bit more complicated than that — at least if I wanted something better than the supermarket versions. So, I hit the books and did my research.
What’s so Swedish about butter, anyway?
Old trade accounts from Lübeck show that Sweden had a significant butter export already in the 14th century. In 1555, Swedish writer Olaus Magnus noted how “the Nordic landscapes” have a plentiful supply of good butter and exports thousands of barrels. Waxing and waning, the export became increasingly important during the 18th and 19th centuries, with increased quality testing, standards, and even a stamp with runes as a quality marker.
You might think that the Swedes were swimming in the yellow gold all this time, but butter wasn’t a large part of the average diet. Butter was simply too valuable not to sell. And when you did use it, you made sure to get your money’s worth. Not only does Laura Grubb’s book from 1888 detail how to save rancid butter. She also comes with recommendations for recognizing low quality. Apparently, less scrupulous tradesmen would dilute butter with flour, salt, or potato (!) or freshen it up by coloring it with carrots or saffron.
After fending off competition from margarine and anti-fat crazes, Swedish butter is once again in the spotlight, with small-scale dairies such as Vallmobacken (now England-based and renamed as Butter Vikings, isn’t that the best of names?) selling their
It all starts with the cream
Let’s start with the most crucial part: cream.
The quality does make a difference. All in all, I’ve tried at least ten different varieties of cream: organic and non-organic, small-scale dairies as well as Swedish national brands.
The non-organic cream from a small-scale and sustainable dairy won, even over the big brands’ organic best attempt. In its turn, organic won over non-organic among the supermarket brands. It wasn’t statistically significant, but blind testing three different varieties of cream at the same time with precise measures showed that the organic cream was tastier. I’ll need more guineapigs, though…
For the best result, I’d recommend finding the freshest cream you can, preferably with 40% fat. A lower fat-percentage takes far longer to churn. Even more important than organic is finding good quality cream. Ensure that it is without additives.
The color of the cream
Most of the time, my homemade butter has kept the pale nuance of the cream. The old household books offer suitably colorful advice. I could tint it with annatto from the fruit of the achiote tree, turmeric, or juice of yellow carrots (Gerle). Or why not milk infused with crushed marigold petals (Broman)?
Mathilda Langlet’s suggestion in 1884 is to feed the cow generous amounts of carrots to give the cream an appealing shade of yellow. Adopting a local, organic dairy cow and feeding it carrots would make for a future (more expensive) experiment… For now, I am content with awaiting spring. According to Broman, the butter is the very best from May to July, when the cows have access to rich pastures of green grass.
Culturing the butter
“It tastes very… creamy”, a friend suggested with diplomatic encouragement. It took me three or four attempts — “maybe if I whisk it by hand? Use a different cream?” — before a chef solved my problem by reminding me to culture the cream.
While it is less common in the US, almost all butter in Sweden and large parts of Europe is cultured. Culturing came from the necessity for small farms to sometimes gather cream for two or three days before they had enough to churn. Maria Möller’s instructions for the household and kitchen from 1863 suggests that the cream would culture by itself. You needed to stir it “diligently, yes, several times per day” to ensure that the culturing would spread evenly.
So why bother with culturing? Not only does cultured cream churn faster and results in more butter. It also contains more diacetyl, the compound that contributes to the buttery aroma.
Different culturing agents, different butter flavors
While the traditional way to culture cream is simply by leaving it alone, t
The tastiest results came from using soured milk from a local, organic dairy farm — the fresher, the better. Using
One experiment tested three batches at the same time — one with soured milk, one with crème fraîche, and one with soured cream. 3 dl (roughly 1 1/4 cups) of cream was mixed with 1 1/2 teaspoons of a culturing agent. The three batches all turned out tasty, though the crème fraîche butter got a bit too strong flavor. If you’re using crème fraîche, let it culture for a shorter time.
There are other ways of culturing the butter as well, for example, by using wild honey — something I have yet to test.
Testing cream culturing times
I’ve cultured the cream at room temperature 12-24 hours during most of my experiments. In the summer, 12 hours might be enough, while colder temperatures in the winter would sometimes mean waiting up to 36 hours.
You can also let the cream culture in the fridge for a few of days before churning. This slows down the culturing process and allows the flavors to develop. The cream is done when it has thickened and has an acidic, pleasant taste.
In his deliciously title book Smör (butter!), Johan Hedberg proposes experimenting with cream cultured over three days. This would mimic an old method, where you might need to gather cream over a couple of days before you had enough to churn.
If you want to test this, stir 1-2 teaspoons of soured milk into 1 cup of cream, cover it and leave it at room temperature. Repeat this the two following days with two new cups of cream, then on day four pour the creams together and churn. This butter turned out a bit too cultured for my taste, at least for everyday use. However, the unchurned cultured cream was the best crème fraîche I have ever eaten, so it is worth testing if only for that.
Culturing times lets you experiment. If the room temperature is high or you use more soured milk, the culturing process will happen faster. Leave the cream to culture for a longer time, and you’ll get a more intense acidic flavor.
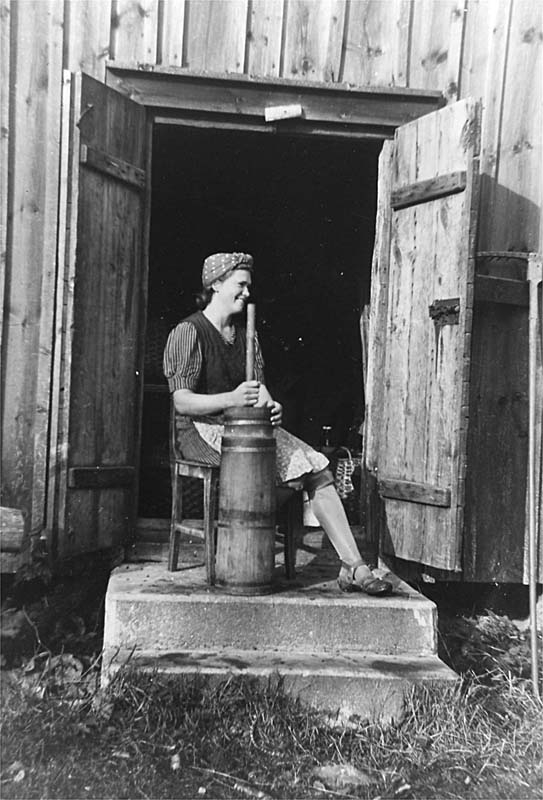
Churning the cream
There’s a deep satisfaction in watching the cream’s stages. First, the whipped cream turns grainy. As you keep whisking, it starts to make a wet, sloppy sound. Then, small yellow pearls begin to lump together and separate from the buttermilk.
Hjorth suggests that the cream needs some time to churn, so we do not risk overworking it. But don’t worry — modern technology will do that much faster than the 40 minutes Maria Möller suggests for traditional churning. However, we won’t speak of the today’s big dairy factories were special canons blow cream into butter in an instant…
Whisking the cream by hand didn’t create a discernible difference in the butter — only in the muscles of my weak forearms. Other options for churning include pouring the cream into a jar, screwing the lid tight, and then shaking. With the size of the batches I made, I deemed it impractical.
Instead, I opted for low speed on a hand mixer. Using a hand mixer made it easier to get a feel for when the pearls start to form, compared to a stand mixer — but if your stand mixer has a slow setting, that could work well, too.
The ideal temperature for churning
Maria Möller suggests that too warm cream makes churning more strenuous, resulting in butter that is “sticky and like lard, and of white color”. Traditionally, churning would be done in the early morning when the air is fresh. You could also add cold water to the cream occasionally during the churning to make sure that the temperature was low.
So, what is the ideal temperature? In 1892, Laura Grubb recommended that you churn at a temperature of 13,5-14°C (57°F) for cultured cream. This agrees with von Euler’s 1939 study that showed that the highest concentration of the butter aroma diacetyl in butter churned at 14°C, compared to 8°C and 19°C.
So 14°C (57°F) it is. I’ve handled this by
To wash, or not to wash?
Von Euler reports in 1939 that diacetyl gives the butter its typical buttery flavor. Unfortunately, 80% of the diacetyl departs with the buttermilk, and only 20% of it stays in the butter. Only a small part of the diacetyl in the butter is stored in the fat, and the rest disappears when you wash the butter.
Swedish dairy Vallmobacken had the top restaurants queueing for their flavorful “virgin butter”, where the butter wasn’t washed clean of buttermilk.
So why wash the butter at all? It may seem a bad idea to rinse away so much of the flavor. While the buttermilk contains a lot of flavor, it unfortunately also helps to spoil the butter.
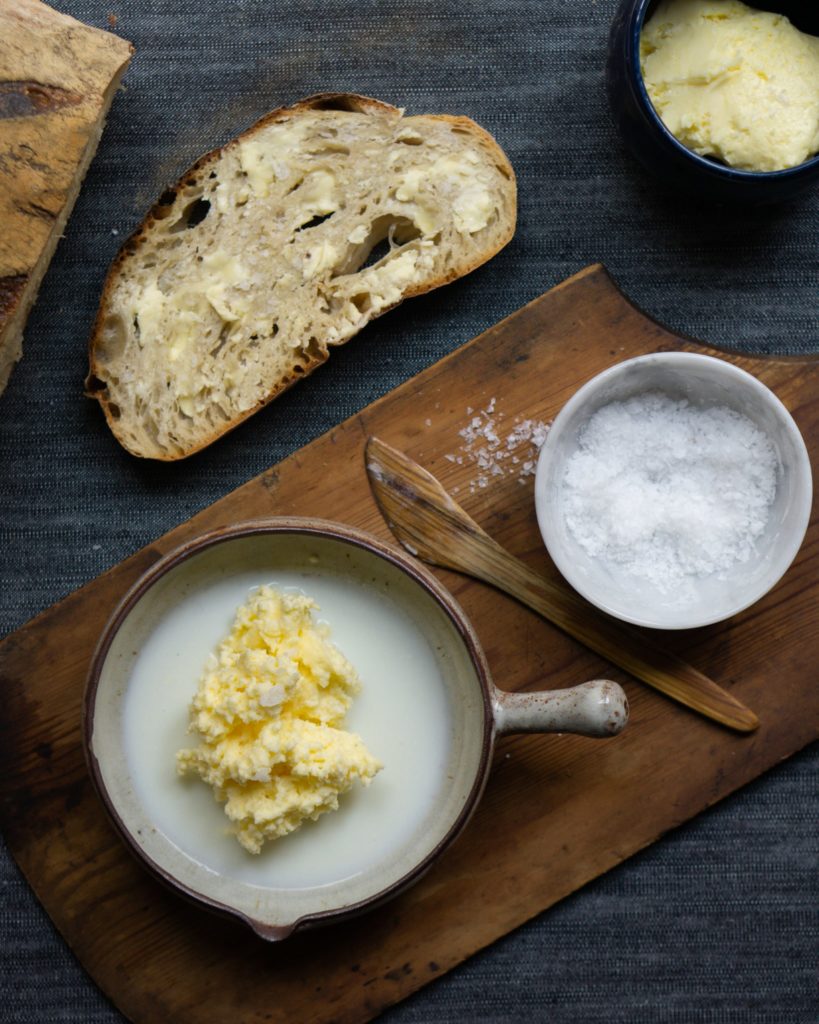
For butter that I’m using within the next couple of days, I only squeeze off the buttermilk by hand as I lump the pearls together. As you work the lump, more of the milk will be released anyway. If I want to keep the butter a bit longer, I wash it around three times.
Working the butter
If you’re eating the treasure right away, the texture will not be a problem. But save it for another day, and you’ll notice that the butter is almost brittle. To get a smoother consistency, you need to work it.
The collected advice seems to agree that you shouldn’t knead the butter. Instead, you push, press, and flatten it out with your hands or a wooden spoon. Maria Möller and Gerle suggest that any wooden equipment should be of beech, birch, or oak — not pine. Talk about being specific…
My notched rolling pin happened to be beech, but the cutting board was bamboo, and it was fine. It seems like as long as you rinse any wooden equipment with cold water to prevent stickiness, you’ll be alright.
Maria Möller suggests that you should first work the butter, then salt it, then let it rest for 8-10 hours. Afterward, work it again until you get a smooth texture without graininess. Any liquid should be clear, not milky. As they say, so poetically — the butter cries. I tend to only work the butter once.
Salting the butter
Once again, Maria Möller is particular. Normal cooking salt is out of the question, and “Liverpool salt” deemed too bitter. She lauds German Lüneburger salt as the very best and gets backing from several other writers. Finely ground Maldon sea salt will have to suffice for me, as the Lüneburg saltworks closed in 1980. Use according to taste — sorry, but that’s my best instruction.

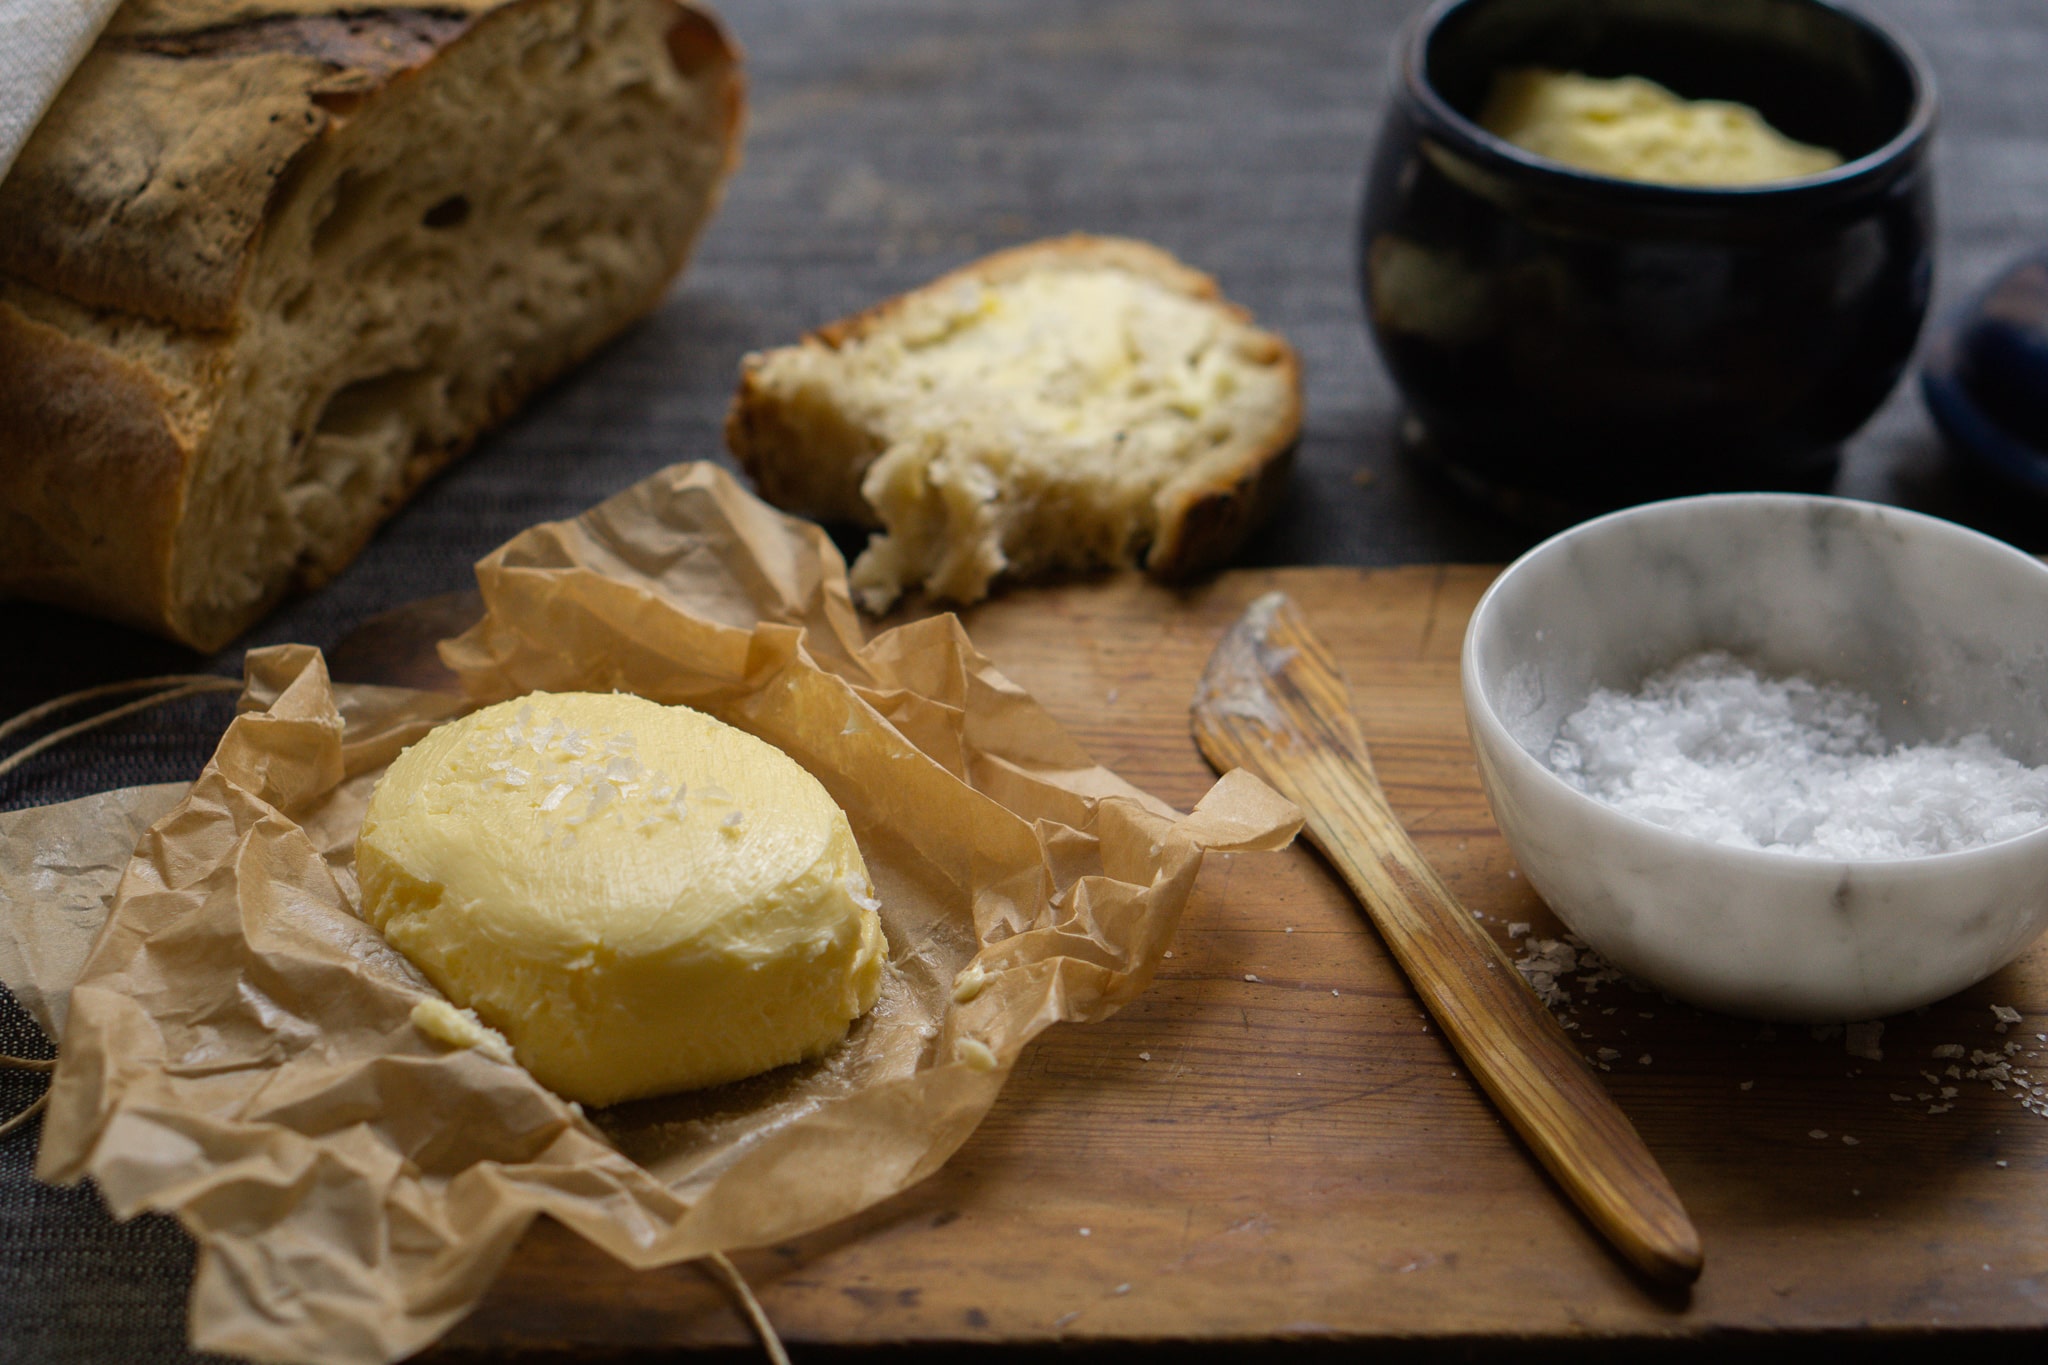
Presenting your glorious result
Let’s look at two reasons why you should pay attention to the presentation of your homemade butter.
Firstly, it is appropriate to honor your lovingly-churned butter and your effort by showing it off the way it deserves.
Secondly, it is correct from a historical perspective — at least in Sweden.
In Hälsingland in the late 18th century, butter meant status. During festivities, the table centerpiece was a decorated stand of butter — not for eating, but for showing the abundance. The digital collection of the Nordic Museum shows a wealth of designs from the 18th and 19th centuries. They often have simple shapes, but some feature carved decorations or elaborate paintwork.

By filling a wooden form called smörkyrka, “butter church”, and chilling it, the yellow gold would come out in
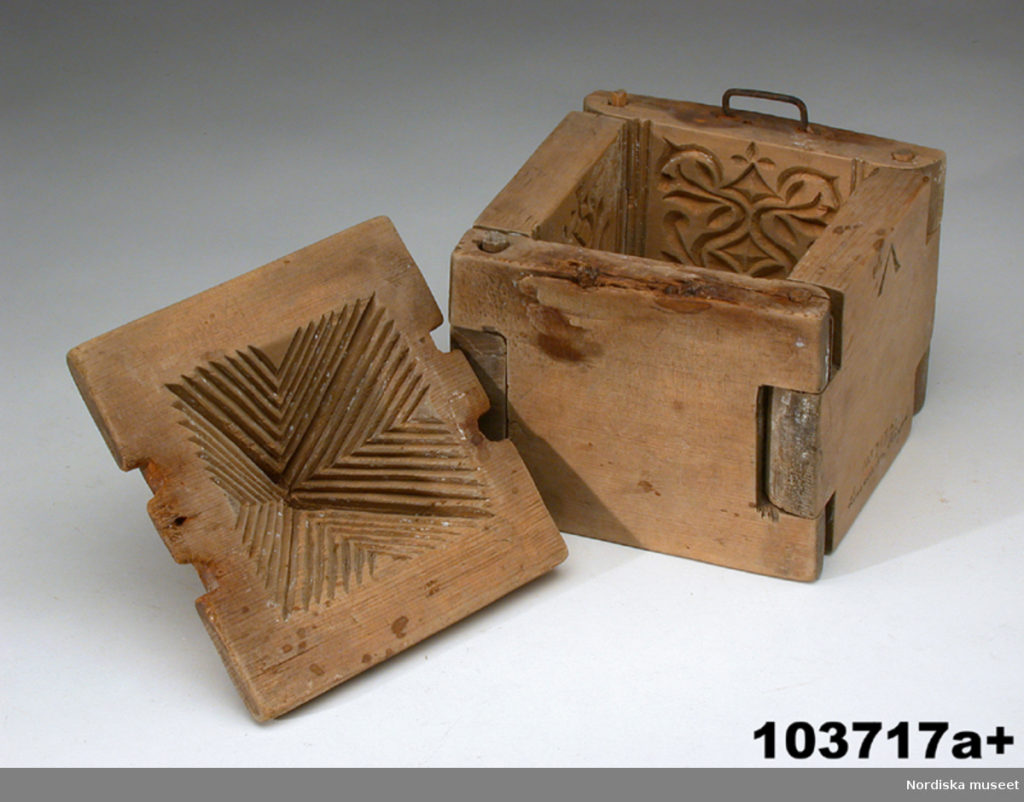
If you get your hands on something similar, remember to soak it in water first to prevent the butter from sticking to the wood.
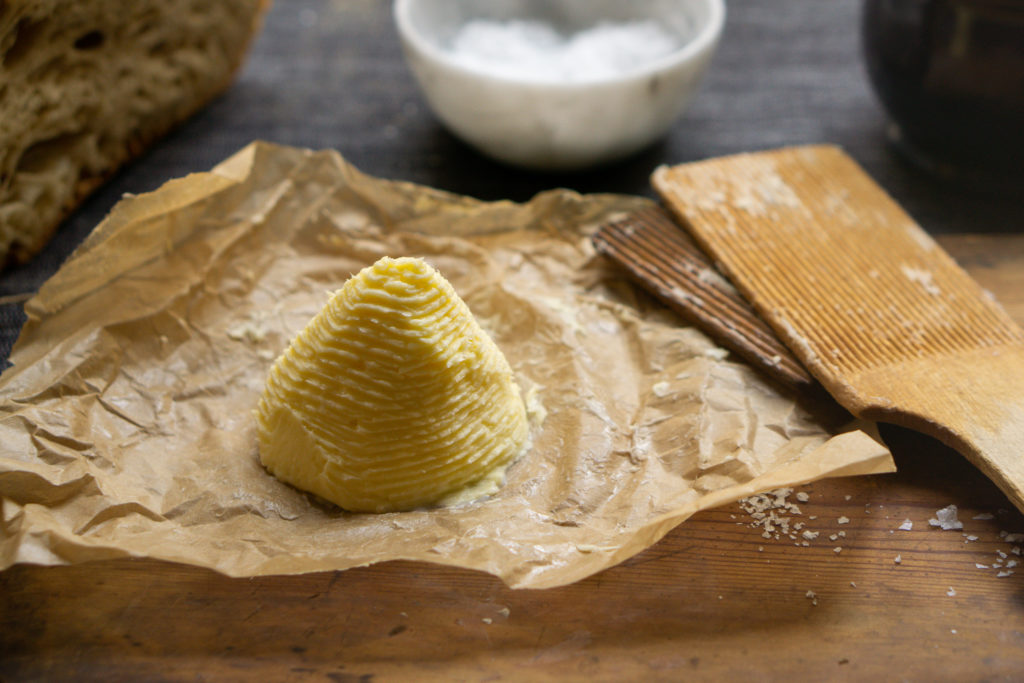
I’ve opted for a somewhat simple approach, using a pair of ribbed wooden spatulas, “Scotch hands”, to form pyramids or patterned logs.
How to make flavorful cultured butter at home
To recap, use the best cream you can find, preferably with a fat content of at least 40% and no preservatives added, ideally from a local and organic dairy. I try to use the butter within a week. As always, use your common sense and smell and taste it. The better you cleansed it from the milk, the better will it keep. Von Euler notes that the amount of buttery-tasting diacetyl declines after 12 days. This sounds like a good excuse for finishing your batch quickly — and then starting a new.
2,5 dl (1 cup) fresh, high-quality cream
About 3 tsp high-quality fresh soured milk, sour cream, or creme fraiche.
Fine-ground sea salt, to taste
Day 1: Culturing the cream
- Add the soured milk to the cream and stir. I’ve stirred the buttermilk straight into the package of cream and re-sealed it. You could also pour the cream into a jar or use a bowl.
- Cover the cream and place it at room temperature. Leave it for 12-24 hours, or longer if you want. You want the consistency to be thicker (somewhere between buttermilk and crème fraîche) and the flavor to be slightly acidic.
Day 2: Churning the butter
Optional: Refrigerate the cream for at least an hour. An alternative is to refrigerate it longer and (preferably) take it out about half an hour before you start.
- Using a stand mixer or a hand mixer, start whisking the cream at a low speed. When the cream goes from whipped to grainy, you’ll need to pay attention. This is when the magic happens. Soon you have pearls bathing in buttermilk. Take it slow and stop before the butter has lumped together around the whisks.
- Lump the butter together into a ball and squeeze out excess buttermilk with your hands.
- Congratulations! Add some salt and enjoy, or wash and work it:
Optional but recommended
If you’re not eating the butter straight away, you can wash and work it, so it lasts longer and has a finer texture.
Washing the butter
- Get a small bowl, a large bowl, and a wooden spoon. Fill the large bowl with ice-cold water — I’ve added ice cubes to mine, but it works without, too.
- Place the butter in the big bowl of cold water and wash it by folding it and pushing it into the sides of the bowl. You can use a wooden spoon or even your hands.
- When the water has become cloudy, place the butter in the small bowl and change the water in the big bowl.
- Repeat the washing process until the water stops becoming cloudy (usually about three
o r four times).
Working the butter
- Preparations: Wet a cutting board and a rolling pin with water. It is a good idea to dedicate a tea towel that you keep handy for wiping your hands.
- Place the cutting board on a damp cloth, so it doesn’t slip. Position the butter on the cutting board and flatten it with the rolling pin. I’ve flattened it to roughly ½ inch or 1 centimeter. Once it is flat, fold or roll it back — easiest done with a large metal spatula. Repeat the process about three times.
- Flatten the butter and spread the salt over it. Fold and flatten a couple of more times to get an even distribution of salt. Taste to see that the saltiness is right for you.
- Now your own flavorful butter is ready.
Troubleshooting
Is your cream not behaving as you’re churning? Carl Eskilson Dahlman’s book on household management from 1743 comes to the rescue. Stir the cream with a reddened reaping hook, then throw the cream under your outhouse and the churner to the
Don’t have suitable tooling, a rustic privy or porcine animals available? Start another attempt, with fresher, higher-quality cream of higher fat content. And remember not to churn while there’s thunder. I don’t recall who told me, but with that weather, the cream refuses to transform.
But, in all seriousness, I’ve had hard times churning the cream when it is to warm. It took much longer as it didn’t want to form butter pearls. That’s why I’d recommend that you keep it well chilled.
The quest continues
The experiments have helped me appreciate a kitchen staple that I’ve taken for granted.
Considering butter to be that — a kitchen staple — shows how fortunate I am to live in a time and place where that kind of privilege is possible.
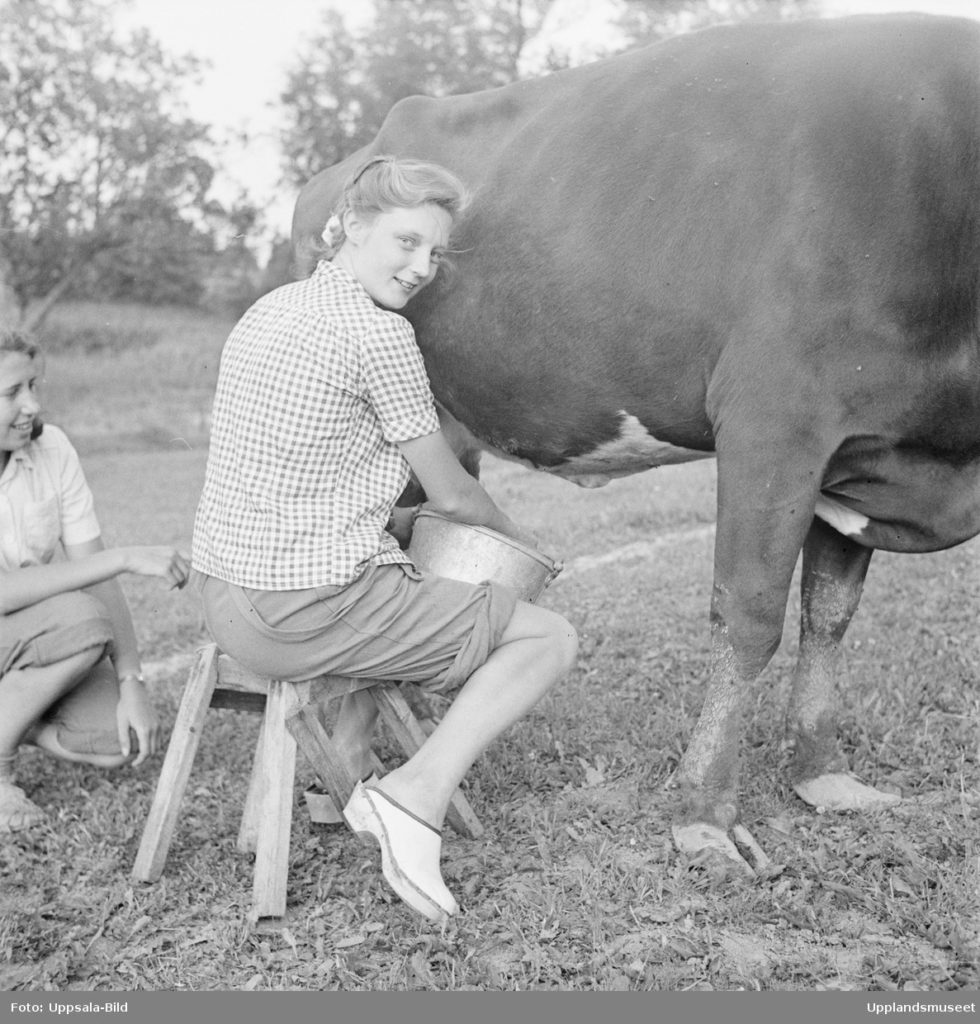
Even using store-bought cream and electric mixers, making the best homemade butter requires some time. That effort pales in comparison to the strenuous labor involved in milking the cow, separating the cream from the milk, culturing, churning, and working the butter. And then, how much was at stake back in the days when butter was a valuable product for trading.
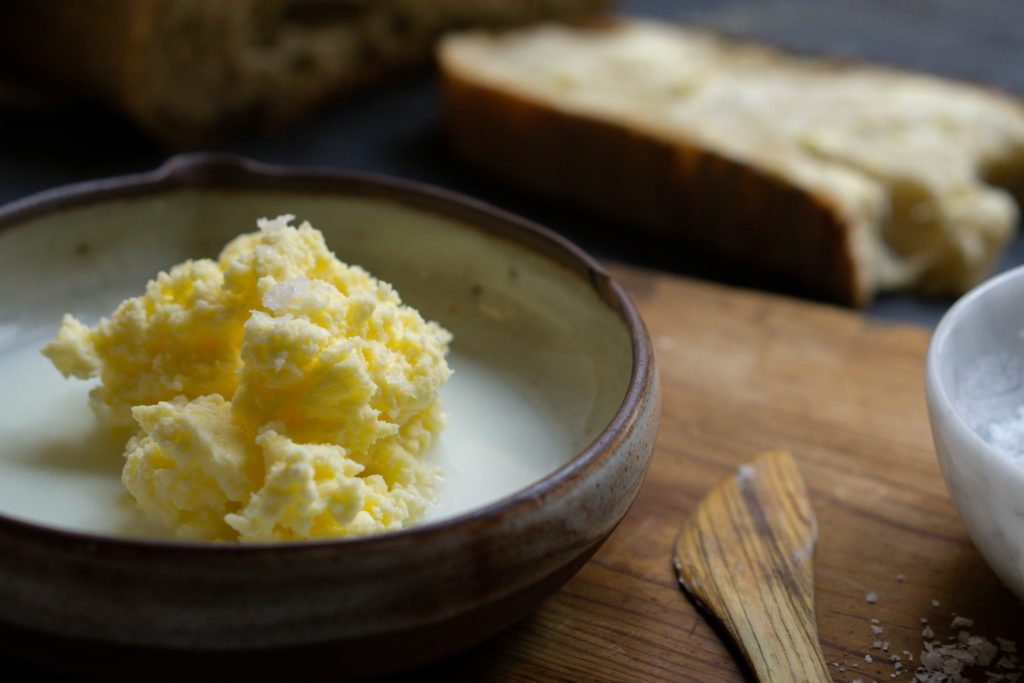
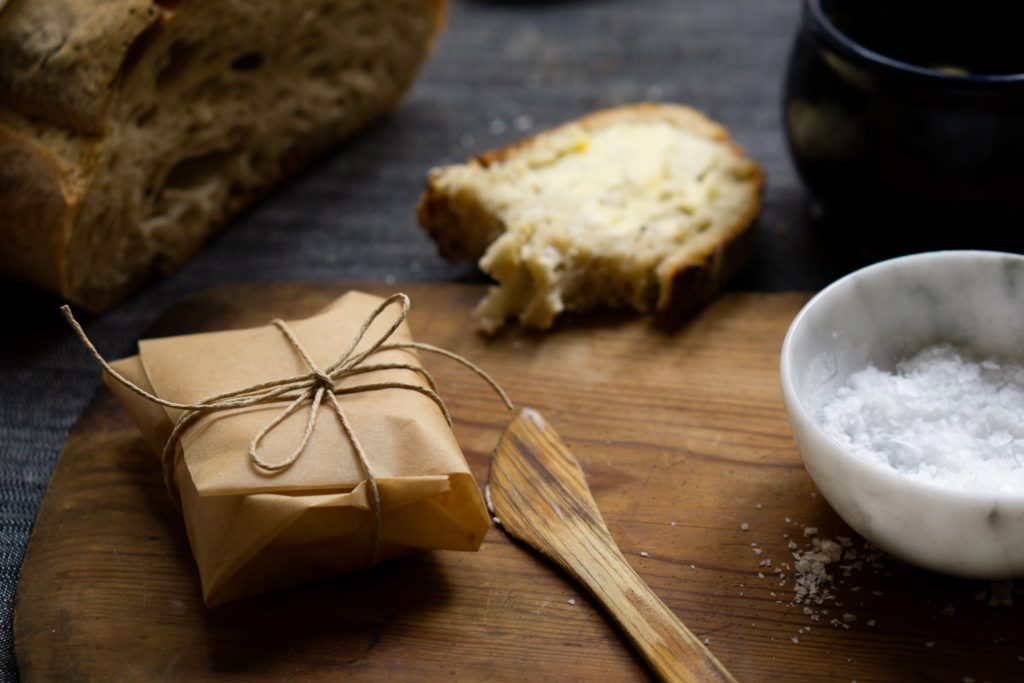
Making butter might not feel like the first thing to put on an already long to-do list. But the amount of flavor you get for relatively little work is thrilling — even addictive. Once you’ve had a slice of fresh bread spread with your own homemade butter, it’s hard to go back.

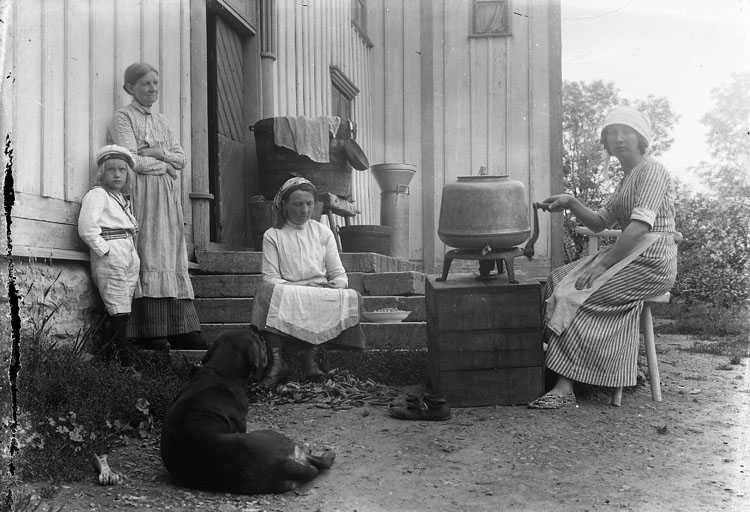
I volunteer at a ranch where my responsibility was to teach children how to make butter. I found your article fascinating. I have found what you said to be true by 5 years of experience. We also use a glass jar with a paddle, gear and crank, similar to the big aluminum vessel with a handle you pictured. Being of Swedish descent, and having the job of teaching how to make butter made me feel as though I had achieved one of my purposes.
Thank you for your comment, Marilyn. It sounds like you have a dream volunteer job! And an important one, too, as the children get increased respect for the food and its history. Out of curiosity, do you culture the cream, too? I know that isn’t as common outside Europe.
While the classic wooden churner seems to be the most common in Sweden, I’ve seen several glass jars like the ones you described, looking similar to this one from Husqvarna: https://digitaltmuseum.se/011024601938/smorkarna