
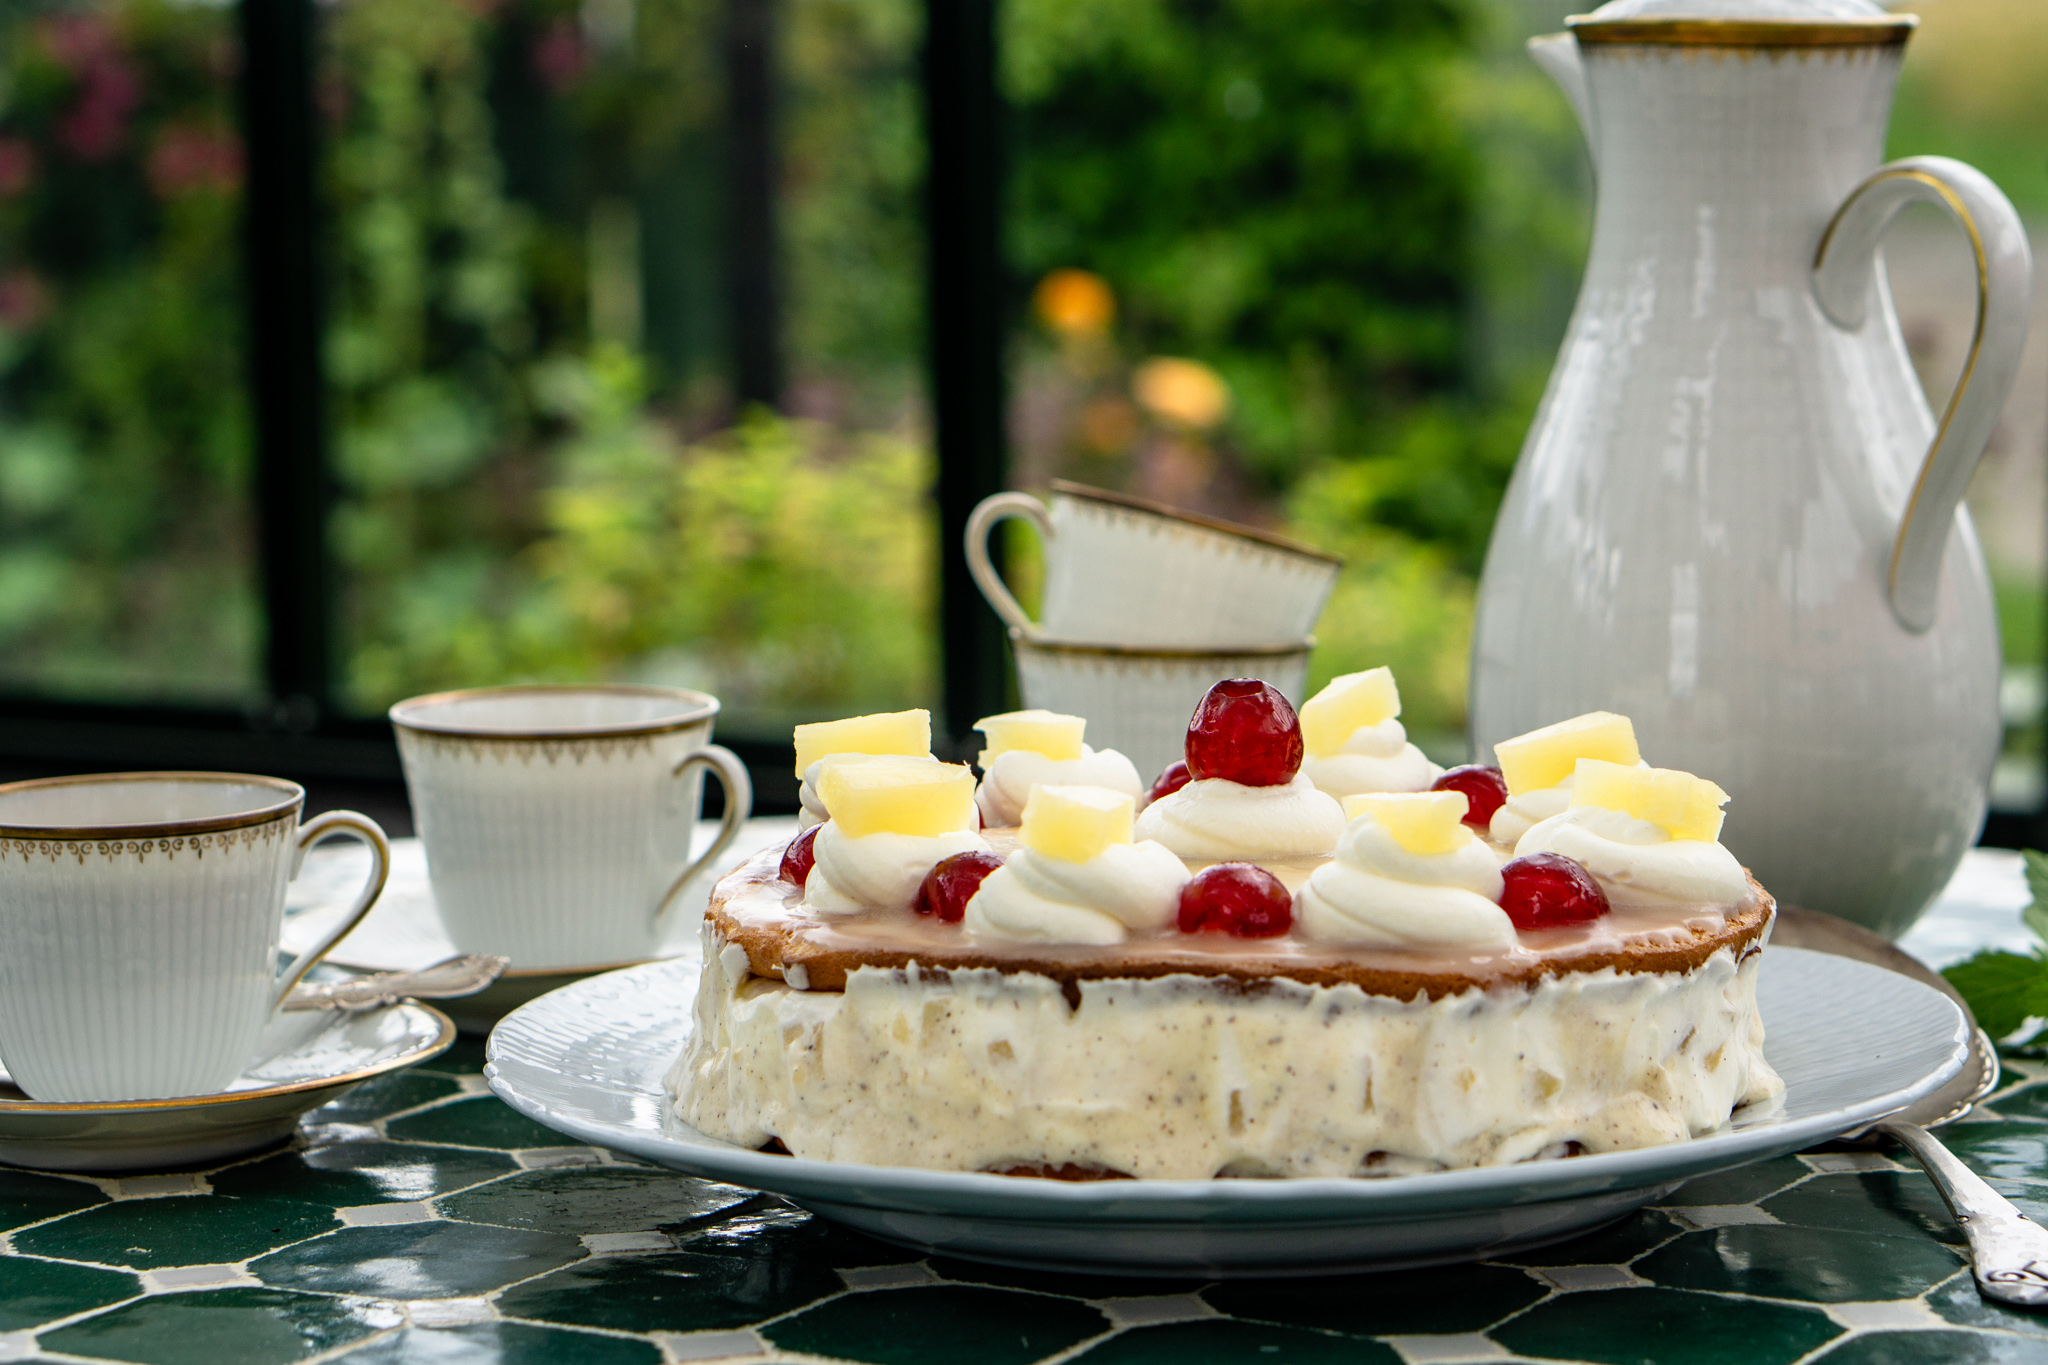
Whipped cream, slices of pineapple in juice, and those glacé cherries — have you seen a cake look more retro than this Tangotårta, “tango cake”?
To celebrate the 106th birthday of one of my favorite tango orchestra leaders, composers, and bandoneonistas — Aníbal Troilo — I decided to bake a tango cake. The cake comes from Elsa Anderssons Konditori in Norberg. The enterprising young Elsa started her café in 1916. The café moved to the current location in 1919 but unfortunately, the original house burnt down in 2015. What a shame! Luckily, it has been rebuilt in the same style.
While the café is no longer in the family, it is still known for this particular cake. And, the recipe for tango cake is apparently the same as in Elsa’s time. As you can tell, the cake is named after the dance with the same name. From the café’s website, it seems that the cake is a creation from the 20s.
So, what was the verdict?
Well, I haven’t tried the original, but my guinea pigs and I agreed that it was “surprisingly good”. It speaks for itself the person normally disinterested in desserts went back for seconds…

How to make a tango cake à la Elsa Anderssons konditori
I made a few adaptions for this recipe compared to the original — I made a smaller cake (add 50% for something closer to the official recipe’s original size), made my own custard instead of a store-bought version (do whatever you prefer), and assumed not all readers may have easy access to almond paste. Plus, I preferred a slightly thicker glaze on top…
Ingredients
For the almond layers
175 g or 2 2/3 dl (6 oz or about 1 1/4 cups) almonds
175 g or 2 4/5 dl (6 oz or about 3/4 cups) sugar
2 egg whites
For the custard
2 yolks
1 1/2 dl (2/3 cups) milk
2 tbsp sugar
2-3 tbsp cornstarch
1/4-1/2 tsp vanilla powder
optional: 1 tbsp butter
For the filling
3 slices of pineapple in juice
4 dl (1 2/3 cups) whipped cream
For decoration
3 tbsp powdered sugar
1 tbsp water
1 slice of pineapple in juice
a few glacé cherries
(remaining whipped cream)
Method
- Set the oven to 200°C/390°F.
- Make the layers: Blanche the almonds to remove the skin. Pat off excess water from the skinless almonds and either grind them in a nut grinder or mix them in an electric mixer. You want it to be finely ground. Add the powdered sugar and egg whites and blend until you have a smooth paste.
- Take a baking paper, put a small plate on it (mine was about 18cm in diameter), and draw two circles. Place it on a baking tray and spread the almond paste over it. Bake in the oven until it gets slightly golden — it took me 15 minutes but will depend on the oven, so keep an eye on the layers so they don’t burn. Once they are ready, let them cool on the baking papers before removing them.
- Make the custard: add all the ingredients to a saucepan and whisk it over low heat until it thickens. If it doesn’t get thick enough, you can add a little bit more cornstarch. Remove it from the heat and let it cool.
- Once the layers and the custard have cooled, make the simple filling: Drain the pineapple slices and chop them finely. Whip the cream until it is thickly whipped. Note: If you want to decorate the cake with whipped cream, reserve the amount you want — I used a few tablespoons. Stir the pineapple into the remaining whipped cream.
- Now it’s time to assemble! Spread one of the layers with the custard. On top of the custard, add the whipped cream and pineapple-filling. Add the second layer on top, so you get the flat side facing up.
- Decorate: Stir together the powdered sugar and water. Spread it over the top layer. Cut the pineapple slice into small pieces. Decorate the cake as you wish with whipped cream, small pieces of pineapple, and glacé cherries.
- Enjoy your delicious retro cake!
Suggestions
This cake gets even better after a few hours in the fridge, or even the day after.


Looks delicious. I want to try it.